After the battle recorded in the previous post, I felt I had unfinished business with Paul and his Russians, so I challenged him to a game the following Saturday club meeting. Vana joined us again with his Austrians, and
Ian, returning to the Napoleonic fold, partnered me with his French.
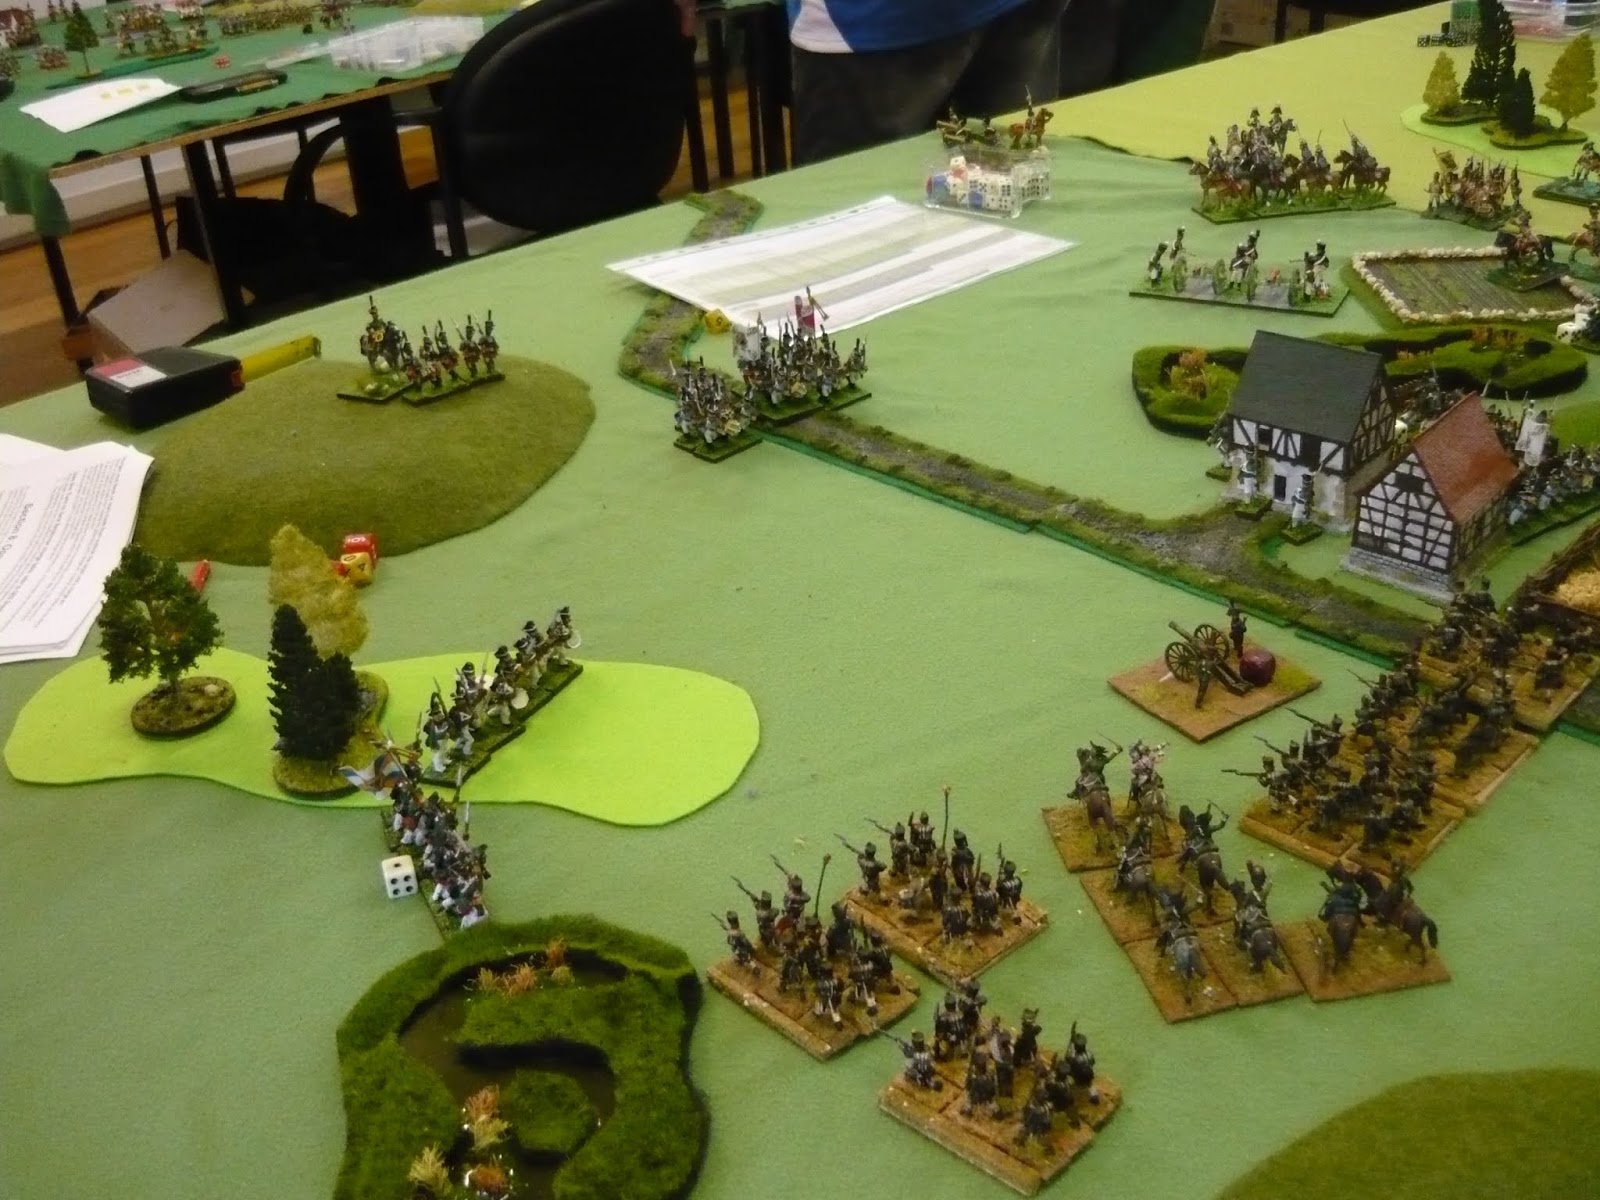
This time Paul had an idea to make the game more of a challenge by adding a string of impassable marshy ponds down the middle of the table, in effect creating 3 avenues for attack. I think he may have come to regret his decision!
Where Ian's and my forces brushed elbows in the centre of the table was one avenue, which I left mainly to Ian. On my left flank was another between a marsh and a village. The woods and fields to the right of this village meant any advance from that direction would end up with multiple disorders, so having learnt my lesson from the previous game, I decided that my brigade on that flank would stand on the defensive and protect Ian's left flank. If Paul wanted to attack over all that, he was welcome!
The left flank provided much better options, especially as I'd organised a combined arms advance with an overpowering superiority in artillery. This time I wasn't going to waste my guns and advanced with proper support. The whole force had a protective skirmish screen out in front and a strong second line to either protect the flank or exploit any breakthrough.
Paul seemed focused on the central avenue, where he was aiming his cavalry and his dreaded 12 pounders. Fortunately, he didn't have much of a target as I kept my troops behind the lee of the nearest hill. On the left, I was screened by the village and his own troops for the time being.
Paul occupied the village and moved his infantry into closed column to counter the cavalry threat posed by my Italian dragoons moving around the left flank. All that did was make lip-smacking targets for my artillery. Once I got my skirmish screen out of the way, his infantry suffered the attention of two 8-gun foot batteries and one 6-gun horse battery. Ouch!
In an effort to mitigate the cavalry threat, Paul moved a couple of infantry battalions into the woods to have a flank shot on any forward movement by my cavalry. I have a long history of throwing away my cavalry too early, so I decided patience was a virtue and left them where they were, sheltered on the left by the nearest marshy pond, while bringing up some infantry to potentially deal with the Russian lurkers in the woods at a later stage.
Meanwhile, in the centre, Vana and Ian were having a backwards and forwards, to and fro, hammer and tongs, cavalry and infantry, Clash of the Titans arm wrestle in the extremely restricted central corridor. Ian had set up an anchored line with cavalry support, daring Vana to attack. Vana was forced to go in piecemeal because he couldn't deploy the forces he needed to really apply pressure. Besides some opportunistic clashes, I think their flank was relatively quiet for most of the game.
Paul decided discretion was the better part of valour and began backing off on the flank, unable to withstand the pressure of the artillery. I even managed to get one Russian battalion to retreat after inflicting too many casualties! I could have possibly forced the issue and attacked up that corridor, but with Russian infantry covering the approach on both flanks, I wasn't sold on the idea. Especially when it seemed Paul was switching his attention to the centre. He deployed troops from the village to threaten the flanks of my central infantry brigade, so I began redeploying my reserves and artillery to try and counter this threat. In the meantime, one of the central battalions had to turn to face the threat, thus weakening the line facing the approaching enemy infantry. This made it a target for the 12 pounder battery, which mauled it in typical fashion in some of its only action of the game.
Approaching my central brigade through a ploughed field surrounded by a stone wall was Paul's light infantry brigade. I was relatively confident that they could be contained, because I had uncommitted reserves and was bringing my batteries over to the centre. Even if they could damage my infantry facing them, I Paul didn't have the troops to exploit any breakthrough, whereas I had the infantry to go on the counter attack. I just had to get them in place. He, meanwhile, was advancing through difficult terrain. My right hand columns were in closed column due to the threat posed by some Austrian dragoons, so Paul angled his attack to focus on the right hand light infantry battalion. the whole brigade stood and fired. It wasn't enough to stop the charge, but it did some damage and with the general attached, the right hand column was only forced to retire. The Russians ended up just short of Ian's infantry square and with an exposed flank. Needless to say, in my next turn, the nearest battalion moved up and fired into their flank. With their disorders and an unfavourable die roll, they were soon running for the rear! The other two Jaeger battalions charged directly ahead and met my other battalions in an inconclusive draw, both being forced back off the hill with disorders.
Vana then followed up with a cavalry charge from his small dragoon regiment to dissuade me from following up my success. I'd already formed the column into closed column, so I wasn't too worried, and with supporting fire from Ian's square and my neighbouring column, the charge was repulsed.
By this stage, Paul's infantry had nothing left and, from memory, Vana's had shot its bolt and crashed against Ian's steadfast line.
 |
| My French forces boldly stepping off. Will they do better than last game? |
 |
| Paul's Russians divided between the flank.... |
 |
...and the centre.
His 12 pounder battery spent most of the game pivoting left and right behind the village, only unlimering and firing a couple of times all game. Phew! |
 |
| Ian partnered me with his French, mainly focusing on defending the central corridor. |
 |
| Vana's Austrians began looking like they'd try going around the flank... |
 |
| ....rather than the centre. |
 |
| Paul began strongly in closed column to claim the village. |
 |
| He moved a small force into the woods on the far left flank to dissuade me from trying to move too far forward. |
 |
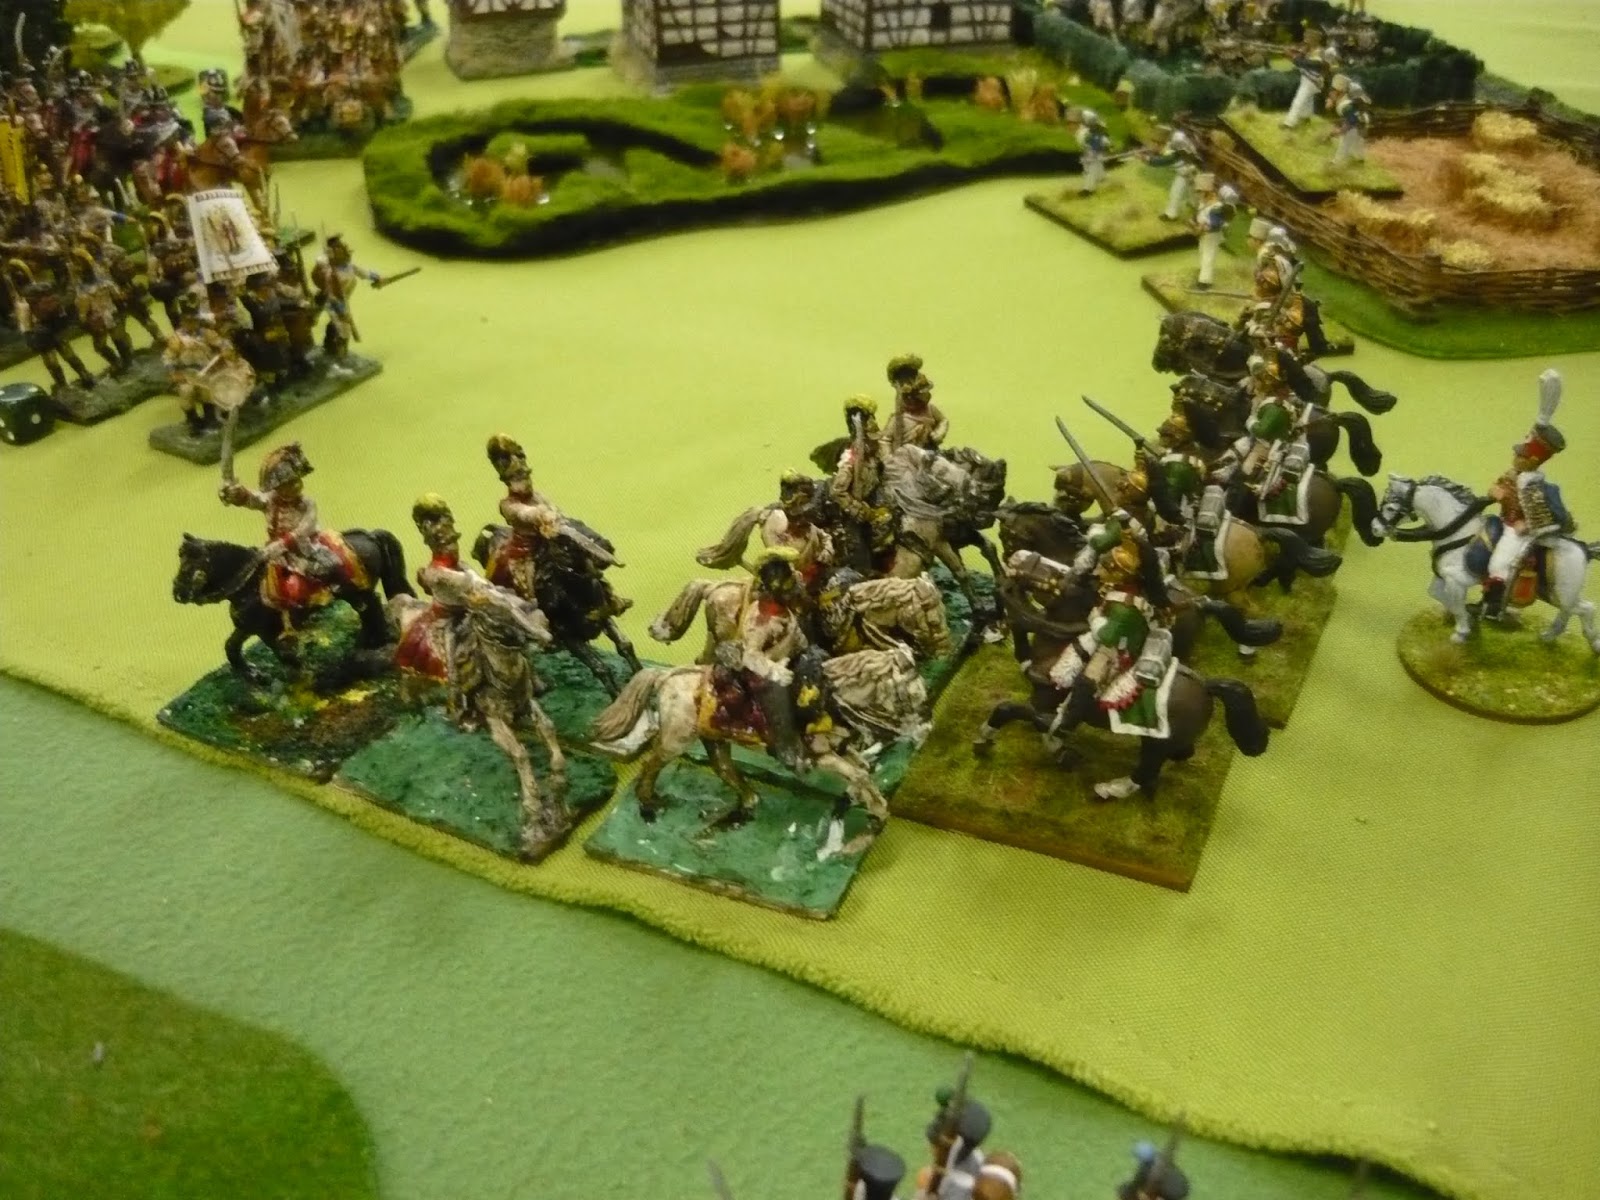
| He was worried about my Italian dragoons (as well he should!) |
 |
| My Legere skirmish line was ineffectual and was going to get in the way of the artillery, anyway. |
 |
| So they scooted off to allow the guns to have an unimpeded field of fire. The battalion on the left copped it something shocking!. |
 |
| The skirmishers redeployed to the centre where they acted as the eyes for the battalions hiding from the 12 pounder battery on the reverse slope. |
 |
| Ian forms up an anchored line in the face of Vana's combined arms advance. |
 |
| Ian's chasseurs launch an opportunity charge at Vana's infantry in just about the only clash on the right flank all afternoon. That put the brakes on any further Austrian advance and devolved into back and forth artillery volleys. |
 |
| Ian deploys his dragoons in front of his anchored line in preparation to charge the guns. |
 |
| Meanwhile, my guns are taking a toll on Paul's closed columns |
 |
| Paul's infantry in the ploughed field and his cavalry seem more interested in what's going on with the Austrians. My infantry are still keeping their heads down as Paul's artillery dither. |
 |
| My dragoons weigh up the odds. |
 |
| Infantry come up in support, possibly to clear out the woods on the flank to allow the cavalry a free hand. |
 |
| Ian charges the guns! |
 |
| While the horse guns limber and flee, the nearest infantry is extremely lucky and forms square in the nick of time! |
 |
| Vana's cavalry then charge Ian's blown and disordered dragoons... |
 |
| ...who are forced to withdraw! |
 |
| I was severely tempted to push on around the left flank... |
 |
| ...but things started to develop in the centre! My left hand battalion had to turn to face the threat to its flank, while the rest of the brigade face the infantry and cavalry threat to the front. |
 |
| My guns limber and redeploy to the centre. |
 |
| The crisis point of the game is reached! Ian's infantry is faced by Paul's cavalry and a remnant of Vana's infantry. My columns on the hill are facing a massed formation of Jaegers. |
 |
| The Jaegers charge my light infantry in closed column, who can't bear the |
 |
| the nearest two battalions have been forced off the hill, perfectly positioned to get into the flank of Paul's isolated columns! |
 |
| After changing into closed column, my nearest battalion then pivots and fires into the Russians' flank! |
 |
They vacate the area forthwith (indicated by the white die on the hill).
My artillery has now deployed at close range to pound the nearest Russkis, while fresh reserves approach. |
 |
| Still trying to keep the pressure up on the left flank, but the Russian infantry just keeps backpedalling! |
 |
| Vana's last roll of the dice: his cavalry charges in, but accurate defensive fire stops the charge in its tracks! |


